• Visit our Facebook page at
  • Visit our ebay store at

Deflasking Orchid

Fine washed orchid bark

Preparation of Materials


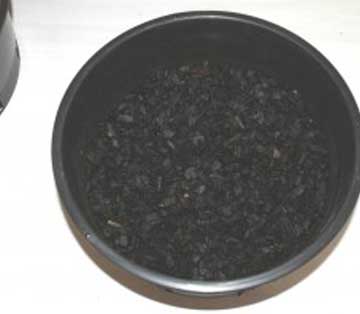
1.Sieve some fine pine bark ( 3-5 mm ) to remove any dust and fill a plastic pot with it. Pour boiling water over the bark to sterilise it and remove any remaining dust. Allow it to cool.

2. Fill another pot with medium pine bark ( 8-10 mm ) and sieve and sterilise in the same way with boiling water.

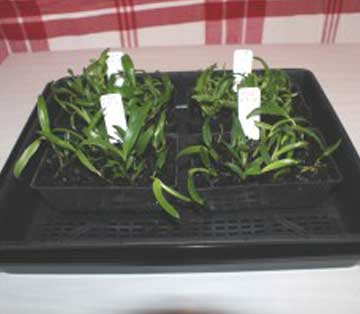
3. If the seedlings are to be planted into used containers, these will have to be disinfected beforehand and for this job I recommend that you soak them in 10% White King ( 0.4% Sodium hypochlorite ) for at least half an hour.

4. Lastly, as far as preparations go, fill the pots or punnets to ¼ of their depth with the coarse pine bark for drainage and then cover with a layer of fine pine bark.

  • Plants removed from flask

    Deflasking Procedure

    5. Choose plants that have a good root system, but are not too crowded. Fewer large plants are better than many small ones.

    6. Gently fill the container with tepid boiled water and carefully tip the seedlings into a container and wash all the agar from the roots.

    7. Spread the plants onto paper towelling and allow them to partially dry and harden for about 20mins.

    8. Place the seedlings into the prepared pots and fill with mix. It is usually better to plant 10-15 seedlings in a punnet or 100-150 mm pot than to individually plant into 25 mm tubes. Once the plants have started to grow you can then split up the community pots into individual plants.

  • Punnet of plants in a seedling tray

    Growing On

    9. Place the plants into a humid box; a Yates seedling tray and ‘Grow Top’ are ideal but a foam fruit box covered with a sheet of glass is also suitable. For the first week leave the air vents closed provide heavy shading and place in a warm position . Near a south facing window inside the house is good.

    10. Check the plants daily for excess humidity and if they are too wet open the vents for a while. After the first week open the air vents of the humid box but leave under heavy shading. A week later remove the Grow Top and reduce shading . The plants may appear a little stressed with some leaf tip burn, but this is better than allowing them to become too soft and weak under high humidity.

    11. After about one month move the plants to your normal seedling growing area which should preferably be a protected part of your greenhouse with overhead covering and 70% shading in summer.

    12. At 6 months your punnets of seedlings should be large enough to repot the seedlings into single tubes or pots.

  • Remember

    • Fungicides are not needed unless seedlings are obviously infected with fungi.
    • Spring and Autumn are the best times for deflasking unless you are able to provide bottom heat during Winter or keep the plants inside your house .
    • Make the changes in humidity, temperature and light intensity from flask to greenhouse for your seedlings as gradual as possible.
    • Water your seedlings with Vitagrow B1. Vitagrow B1 is a combination of auxin plants hormones and Vitamin B1 both which promote root growh.. Together they induce rapid root growth which is vital for young plants.